Float 개념 Float란, CSS에서 레이아웃을 하기 위한 하나의 기술로써, 주로 block 요소를 가로 정렬하기 위해 사용되는 레이아웃 방법이다.
float: none; -> 요소를 떠 있게 하지 않음(default) float: right; -> 요소를 오른쪽으로 이동시키고, 오른쪽부터 가로로 정렬됨 float: left; -> 요소를 왼쪽으로 이동시키고, 왼쪽부터 가로로 정렬됨
float 프로퍼티를 사용하면, 해당 요소를 다음 요소 위에 떠 있게(부유하게) 하는데, 이는 해당 요소가 기본적인 레이아웃에서 벗어나 요소의 모서리가 왼쪽이나 오른쪽으로 이동하는 것을 말한다.(참고로, float를 사용한다면, 요소의 위치를 고정시키는 position의 absolute는 사용하면 안된다.)
Float 기본 사용법 왼쪽 또는 오른쪽부터 가로 정렬을 하고 싶은 요소들에 float를 적용하면 된다.
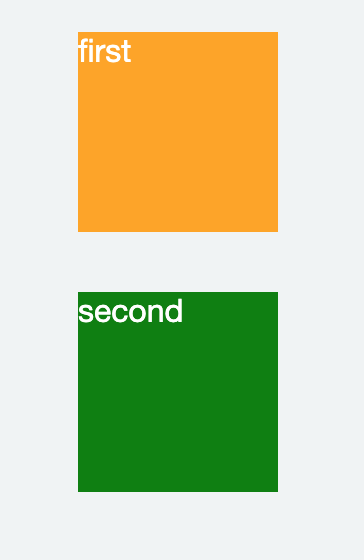
1
2
3
4
5
6
7
8
9
10
11
12
13
14
15
16
17
18
19
20
21
22
23
24
25
26
27
28
29
30
31
32
33
34
import React from "react"; const styleFirst = { float: "right", // float 적용 backgroundColor: "orange", color: "white", width: "100px", height: "100px", margin: "30px" }; const styleSecond = { float: "left", // float 적용 backgroundColor: "green", color: "white", width: "100px", height: "100px", margin: "30px" }; const Side = () => { return ( <div className="parent"> <div className="childFirst" style={styleFirst}> first </div> <div className="childSecond" style={styleSecond}> second </div> </div> ); }; export default Side;
다음과 같이 나온다.
float를 사용하면 위와 같이, 오른쪽/왼쪽에서 가로 정렬만 가능하다. 만약, 중앙에서 가로 정렬을 하고 싶다면, “margin”을 적용해야 한다.
1
2
3
4
5
6
7
8
9
10
11
12
13
14
15
16
17
18
19
20
21
22
23
24
25
26
27
28
29
30
31
32
33
import React from "react"; const styleFirst = { // float: "right", backgroundColor: "orange", color: "white", width: "100px", // height: "100px", margin: "30px auto" // 가로정렬을 위해 auto 적용 }; const styleSecond = { // float: "left", backgroundColor: "green", color: "white", width: "100px", // height: "100px", margin: "30px auto" // 가로정렬을 위해 auto 적용 }; const Side = () => { return ( <div className="parent"> <div className="childFirst" style={styleFirst}> first </div> <div className="childSecond" style={styleSecond}> second </div> </div> ); }; export default Side;
Float 사용시 문제와 해결방법 [1] float를 적용한 요소와 적용하지 않은 요소간 margin이 사라지는 문제
다음의 코드를 작성해보자.
1
2
3
4
5
6
7
8
9
10
11
12
13
14
15
16
17
18
19
20
21
22
23
24
25
26
27
28
29
import React from "react"; const styleFirst = { backgroundColor: "blue", height: "50px", margin: "0 10px", padding: "10px" }; const styleSecond = { backgroundColor: "green", height: "50px", margin: "0 10px", padding: "10px" }; const Side = () => { return ( <div className="parent"> <div className="childFirst" style={styleFirst}> first </div> <div className="childSecond" style={styleSecond}> second </div> </div> ); }; export default Side;
그러면, 다음과 같이 두개의 div가 나온다.
여기서 첫번째 div에만 float를 적용하면 어떻게 될까?
1
2
3
4
5
6
7
8
9
10
11
12
13
14
15
16
17
18
19
20
21
22
23
24
25
26
27
28
29
30
import React from "react"; const styleFirst = { float: "left", // float 적용 backgroundColor: "blue", height: "50px", margin: "0 10px", padding: "10px" }; const styleSecond = { backgroundColor: "green", height: "50px", margin: "0 10px", padding: "10px" }; const Side = () => { return ( <div className="parent"> <div className="childFirst" style={styleFirst}> first </div> <div className="childSecond" style={styleSecond}> second </div> </div> ); }; export default Side;
이렇게 되면, float가 적용된 첫번째 div는 width가 inline 요소와 같이 content에 맞게 최소화가 되고, 다음 요소(두번째 div) 위에 부유하게 된다.(떠있게 된다.) 그러나, 두번째 div 요소의 width는 100%를 그대로 유지한다.
즉, 두 요소간의 margin은 제대로 표현되지 않는다.
이 문제를 해결하기 위한 방법은 float를 적용하지 않은 두번째 div에 “overflow:hidden;”을 적용하는 것이다. “overflow: hidden;”은 자식 요소가 부모 요소의 영역보다 클 경우 넘치는 부분을 안보이게 해주는 역할을 하는데, 여기서는 float 프로퍼티가 없어서 제대로 표현되지 못하는 요소를 제대로 출력해준다.
1
2
3
4
5
6
7
8
9
10
11
12
13
14
15
16
17
18
19
20
21
22
23
24
25
26
27
28
29
30
31
import React from "react"; const styleFirst = { float: "left", backgroundColor: "blue", height: "50px", margin: "0 10px", padding: "10px" }; const styleSecond = { overflow: "hidden", // 적용 backgroundColor: "green", height: "50px", margin: "0 10px", padding: "10px" }; const Side = () => { return ( <div className="parent"> <div className="childFirst" style={styleFirst}> first </div> <div className="childSecond" style={styleSecond}> second </div> </div> ); }; export default Side;
[2] float가 적용된 자식요소를 포함하는 부모요소의 높이가 정상적으로 반영되지 않는 문제
다음의 코드를 작성해보자.
1
2
3
4
5
6
7
8
9
10
11
12
13
14
15
16
17
18
19
20
21
22
23
24
25
26
27
28
29
30
31
32
33
34
35
36
37
38
39
40
41
42
43
44
45
import React from "react"; const parentStyle = { color: "white", textAlign: "center", padding: "10px", backgroundColor: "gray" }; const styleFirst = { float: "left", backgroundColor: "blue", width: "50%", padding: "20px 0" }; const styleSecond = { float: "left", backgroundColor: "green", width: "50%", padding: "20px 0" }; const styleLast = { backgroundColor: "red", padding: "10px", color: "white" }; const Side = () => { return ( <div> <div className="parent" style={parentStyle}> <div className="childFirst" style={styleFirst}> first </div> <div className="childSecond" style={styleSecond}> second </div> </div> <div className="last" style={styleLast}> last </div> </div> ); }; export default Side;
위와 같이, 부모요소의 높이가 정상적이지 못하다. 이를 해결하는 방법은 대표적으로 2가지가 있다.
[2-1] float가 적용된 요소의 부모요소에 “overflow:hidden”을 적용
1
2
3
4
5
6
7
const parentStyle = { color: "white", textAlign: "center", padding: "10px", backgroundColor: "gray", overflow: "hidden" // 적용 };
[2-2] float가 적용된 요소의 부모요소에 clearfix 클래스를 추가하고, :after 가상 요소 선택자를 적용하여 css를 추가
1
2
3
4
5
6
7
8
9
10
11
12
13
14
15
16
17
18
19
20
21
22
23
24
25
26
27
28
29
30
31
32
33
34
35
36
37
38
39
40
41
// Side.js import React from "react"; import "../clearfix.css"; // clearfix.css 적용 const styleFirst = { float: "left", backgroundColor: "blue", width: "50%", padding: "20px 0" }; const styleSecond = { float: "left", backgroundColor: "green", width: "50%", padding: "20px 0" }; const styleLast = { backgroundColor: "red", padding: "10px", color: "white" }; const Side = () => { return ( <div> <div className="parent clearfix"> // clearfix 클래스 추가 <div className="childFirst" style={styleFirst}> first </div> <div className="childSecond" style={styleSecond}> second </div> </div> <div className="last" style={styleLast}> last </div> </div> ); }; export default Side;
1
2
3
4
5
6
7
8
9
10
11
12
13
14
// clearfix.css .parent { background-color: blue; color: white; text-align: center; padding: 10px; background-color: gray; } .parent:after { content: ""; display: block; clear: both; }
위와 같이 코드를 작성하면, 다음과 같이 나온다.
Float 예시 화면 왼쪽과 오른쪽에 “aside”와 “section” 태그를 보여주려고 한다. 이때, float를 사용해서 코드를 다음과 같이 작성하면 된다. 즉, 화면에 보여주려는 요소들에 float를 적용하고, 해당 요소의 부모요소에 clearfix를 적용하는 방식으로 코드를 작성한다.
1
2
3
4
5
6
7
8
9
10
11
12
13
14
15
16
17
18
19
20
21
22
23
24
25
26
27
28
29
30
31
32
33
34
35
36
// Float.js import React from "react"; import "../clearfix.css"; const Float = () => { return ( <div id="parent"> <aside> <h1>Aside</h1> <ul> <li> <a href="#" class="active"> Economy </a> </li> <li> <a href="#">Math</a> </li> </ul> </aside> <section> <article id="economy"> <h1>Economy</h1> <p>...</p> </article> <article id="math"> <h1>Math</h1> <p>...</p> </article> </section> </div> ); }; export default Float;
1
2
3
4
5
6
7
8
9
10
11
12
13
14
15
// clearfix.css #parent:after { content: ""; display: block; clear: both; } aside { float: left; width: 30%; } section { float: right; width: 70%; }