Reset CSS 사용방법

Reset CSS 개념


각 웹브라우저마다 기본적인 스타일(default styles)을 가지고 있다. 그래서, 내가 의도한 css 코드가 각 브라우저마다 다르게 나올 수 있다. 각 브라우저가 지원하는 tag나 style이 다를 수 있다. 따라서, 프로젝트를 시작할 때, 모든 브라우저가 동일한 스타일을 갖도록 CSS를 초기화할 필요가 있다. CSS를 초기화하는 것을 Reset CSS라고 한다.


Reset CSS를 사용하는 방법


아래 둘중에 하나의 방법으로 Reset CSS를 하면된다.

[1] Eric Meyer’s reset

다음의 css 코드를 CSS 파일 최상단에 작성하고 시작한다.

1
2
3
4
5
6
7
8
9
10
11
12
13
14
15
16
17
18
19
20
21
22
23
24
25
26
27
28
29
30
31
32
33
34
35
36
37
38
39
40
41
42
43
44
45
46
47
48
/* http://meyerweb.com/eric/tools/css/reset/
v2.0 | 20110126
License: none (public domain)
*/

html, body, div, span, applet, object, iframe,
h1, h2, h3, h4, h5, h6, p, blockquote, pre,
a, abbr, acronym, address, big, cite, code,
del, dfn, em, img, ins, kbd, q, s, samp,
small, strike, strong, sub, sup, tt, var,
b, u, i, center,
dl, dt, dd, ol, ul, li,
fieldset, form, label, legend,
table, caption, tbody, tfoot, thead, tr, th, td,
article, aside, canvas, details, embed,
figure, figcaption, footer, header, hgroup,
menu, nav, output, ruby, section, summary,
time, mark, audio, video {
margin: 0;
padding: 0;
border: 0;
font-size: 100%;
font: inherit;
vertical-align: baseline;
}
/* HTML5 display-role reset for older browsers */
article, aside, details, figcaption, figure,
footer, header, hgroup, menu, nav, section {
display: block;
}
body {
line-height: 1;
}
ol, ul {
list-style: none;
}
blockquote, q {
quotes: none;
}
blockquote:before, blockquote:after,
q:before, q:after {
content: '';
content: none;
}
table {
border-collapse: collapse;
border-spacing: 0;
}

[2] normalize.css

npm 또는 yarn을 이용해서 normalize.css를 설치한다.

참고: normalize.css


React에서 Reset CSS 사용하는 방법


[1] normalize.css 설치

1
2
3
4
5
// yarn
yarn add normalize.css

// npm
npm install normalize.css

[2] index.js에 import

1
2
3
4
5
6
7
8
9
10
11
12
13
14
// index.js

import React from "react";
import ReactDOM from "react-dom";
// import "./index.css";

import "normalize.css"; // Reset CSS

import App from "./App";
import * as serviceWorker from "./serviceWorker";

ReactDOM.render(<App />, document.getElementById("root"));

serviceWorker.unregister();

Refs and DOM

Refs의 정의


Refs provide a way to access DOM nodes or React elements created in the render method.

Refs란, React에서 DOM에 접근할 때 사용하는 방법이다.


When to use Refs


  • input/textarea 등에 focus를 할 때
  • 특정 DOM의 크기를 가져올 때
  • 특정 DOM에서 스크롤 위치를 가져오거나 설정을 할 때
  • 명령형 애니메이션을 발동시킬 때
  • third-party DOM 라이브러리를 통합할 때


React v16.3 이전의 Refs 사용법


1
2
3
4
5
6
7
8
9
10
11
12
13
14
15
16
17
18
19
20
21
class App extends Component {
constructor(props) {
super(props);
}

handleInput () => {
if (this.myRef.classList.contains("checked")) { // input에 class 관련 적용
Cookie.set("warning-popup", true, {
expires: 1
});
}
}

render() {
return (
<div>
<input ref={ref => (this.myRef = ref)} /> // ref를 input에 적용
</div>
)
}
}


React v16.3 이후의 Refs 사용법


컴포넌트 내에서의 사용법


1
2
3
4
5
6
7
8
9
10
11
12
13
14
15
16
17
18
class App extends Component {
constructor(props) {
super(props);
this.myRef = React.createRef(); // ref 생성
}

componentDidMount () => {
this.myRef.current.focus(); // 컴포넌트가 첫 렌더링 되면, input에 focus 적용
}

render() {
return (
<div>
<input ref={this.myRef} /> // ref를 input에 적용
</div>
)
}
}


부모 컴포넌트가 자식 컴포넌트 DOM에 접근할 때 사용법


1
2
3
4
5
6
7
8
9
10
11
12
13
14
15
16
17
18
19
20
21
22
23
24
25
26
// 부모 컴포넌트
class App extends Component {
constructor(props) {
super(props);
this.childRef = React.createRef(); // ref 생성
}

componentDidMount () => {
this.childRef.current.focus(); // 컴포넌트가 첫 렌더링 되면, input에 focus 적용
}

render() {
return (
<div>
<ChildComponent ref={this.childRef}/> // 자식 컴포넌트에 ref 전달
</div>
)
}
}

// 자식 컴포넌트
const ChildApp = React.forwardRef((props, ref) => { // 부모 컴포넌트로부터 ref 전달 받음
return (
<input ref={ref}/> // input에 ref 적용
)
})

URL 복사하기 버튼 만드는 방법

URL 복사하기 버튼 만들기


어떤 이미지를 클릭하면, 해당 URL을 복사하고, 복사완료! 라는 tooltip이 잠깐 뜨게 하는 기능을 만들어 보자.

  1. react-copy-to-clipboard npm 설치
  2. 위 npm으로 URL 복사 버튼 만들기
  3. 버튼을 클릭하면, 몇 초 동안 복사완료! 라는 tooltip 생성
  4. css로 tooltip 위치 조절


1. react-copy-to-clipboard npm 설치


1
npm install --save react react-copy-to-clipboard


2~3. URL 복사 버튼 및 복사완료! tooltip 만들기


1
2
3
4
5
6
7
8
9
10
11
12
13
14
15
16
17
18
19
20
21
22
23
24
25
26
27
28
29
30
31
32
33
34
35
36
37
38
39
import React, { Component } from 'react';
import url from '../../image/url.png'
import { CopyToClipboard } from 'react-copy-to-clipboard';

export default class Share extends Component{
state = {
copyUrl: 'https://google.com/',
copied: false
}
closeCopied = () => {
setTimeout(() => {
this.setState({copied: false})
}, 2000)
}
onCopy = () => {
this.setState({copied: true}, () => this.closeCopied());
}
render(){
return(
<section className="share">
<div className='share-box'>

// URL 복사 버튼
<CopyToClipboard onCopy={this.onCopy} text={this.state.copyUrl}>
<button><img src={url} alt='url'/></button>
</CopyToClipboard>

// 복사완료! tooltip
{this.state.copied ?
<span>복사완료!</span>
:
null
}

</div>
</section>
)
}
}


4. css로 tooltip 위치 조절


다음과 같이 css를 작성하면, 약간 작은 tooltip이 생성된다.

1
2
3
4
5
6
7
8
9
10
11
12
13
14
15
16
17
18
19
20
21
.share-box span{
background-color: #000000;
background-color: rgba(0, 0, 0, 0.8);
box-shadow: 0px 0px 3px 1px rgba(50, 50, 50, 0.4);

border-radius: 5px;

color: #FFFFFF;
font-size: 12px;

margin-bottom: 10px;
top: 0;
padding: 7px 12px;
position: absolute;
width: auto;
min-width: 50px;
max-width: 300px;
word-wrap: break-word;

z-index: 9999;
}

Redux-Saga를 이용한 API 통신

newsapi.org에 있는 데이터를 가져오기 위해서는, newsapi.org에서 제공하는 API를 이용해야 한다. 이때, 비동기 통신(newsapi.org 서버와의 통신)을 Redux-Saga를 이용해 데이터를 가져와보자.


순서


  1. ‘create-react-app’으로 프로젝트 생성
  2. 프로젝트 앱의 index.js에서 Redux와 연동
  3. store.js에서 Redux의 store를 세팅
  4. Redux와 연결할 Container 컴포넌트와 화면에 보여줄 각 컴포넌트 생성
  5. 통신할 API와 관련된 코드 작성
  6. action 및 action types 등록
  7. Container 컴포넌트에서 액션을 dispatch
  8. 액션을 받아 비동기 통신 처리를 할 saga 작성
  9. saga 이후, state를 변경할 reducer 작성


1. 프로젝트 앱의 index.js에서 Redux와 연동

index.js

‘create-react-app’ 한 이후, 처음 상태

1
2
3
4
5
6
7
8
9
10
11
12
13
14
// index.js

import React from 'react';
import ReactDOM from 'react-dom';
import './index.css';
import App from './App';
import * as serviceWorker from './serviceWorker';

ReactDOM.render(<App />, document.getElementById('root'));

// If you want your app to work offline and load faster, you can change
// unregister() to register() below. Note this comes with some pitfalls.
// Learn more about service workers: https://bit.ly/CRA-PWA
serviceWorker.unregister();


1-1. Redux 설치

1
npm install --save react-redux


1-2. Redux-saga 설치

1
npm install --save redux-saga


1-3. Redux 세팅 및 Redux-saga 적용

1
2
3
4
5
6
7
8
9
10
11
12
13
14
15
// index.js

import React from 'react';
import { render } from 'react-dom';
import { Provider } from 'react-redux';
import App from './App';
import { store } from './redux/store' // redux 폴더의 store.js 파일에서 store 관련 코드 작성

render(
// Provier와 store 적용
<Provider store={store}>
<App />
</Provider>,
document.getElementById('root'),
);


2. store.js에서 Redux의 store를 세팅

1
2
3
4
5
6
7
8
9
10
11
12
13
14
15
16
// store.js

import { createStore, compose, applyMiddleware } from 'redux';
import rootReducer from './reducer'; // reducer.js 파일안에 rootReducer 생성
import createSagaMiddleware from 'redux-saga';
import rootSaga from '../sagas'; // sagas 폴더와 그 안에 index.js 파일 생성

// saga 미들웨어 생성
const sagaMiddleware = createSagaMiddleware();
const enhancer = compose(
applyMiddleware(sagaMiddleware)
)

// store 만들고, reducer와 미들웨어 적용
export const store = createStore(rootReducer, enhancer)
sagaMiddleware.run(rootSaga)

이렇게 하여, Redux store 세팅이 완료되었다.


3. Redux와 연결할 Container 컴포넌트와 화면에 보여줄 각 컴포넌트 생성

  1. Contianer 컴포넌트 생성
    1
    2
    3
    4
    5
    6
    7
    8
    9
    10
    11
    12
    13
    14
    15
    16
    17
    18
    19
    20
    21
    22
    23
    24
    25
    26
    27
    28
    29
    30
    31
    32
    33
    34
    // ContainerRedux.js

    import React, { Component } from 'react';
    import { connect } from "react-redux";
    import Button from './components/Button'
    import Loading from './components/Loading'
    import News from './components/News'

    class ContainerRedux extends Component {
    render() {
    return (
    <div className="">
    <Button
    />
    <Loading
    />
    <News
    />
    </div>
    );
    }
    }

    function mapStateToProps(state) {
    return {
    };
    }

    function mapDispatchToProps(dispatch) {
    return {
    };
    }

    export default connect(mapStateToProps, mapDispatchToProps)(ContainerRedux);


  1. 각 컴포넌트 생성

Button.js

1
2
3
4
5
6
7
8
9
10
11
12
13
// Button.js

import React from 'react';

const Button = ({onClickGetNews}) => {
return (
<div>
<button onClick={onClickGetNews}>get news</button>
</div>
)
}

export default Button;


Loading.js

1
2
3
4
5
6
7
8
9
10
11
12
13
14
15
16
17
18
19
20
// Loading.js

import React from 'react';

const Loading = ({ loading }) => {
return (
<div>
{
loading ?
<div>
<h1>LOADING ...</h1>
</div>
:
null
}
</div>
)
}

export default Loading;


News.js

1
2
3
4
5
6
7
8
9
10
11
12
13
14
15
16
17
18
19
20
21
22
23
24
25
26
27
28
// News.js

import React from 'react';

const News = ({ articles }) => {
return (
<div>
{
articles ?
<div>
{
articles.map((article, key) => {
return <div key={key}>
<span>{article.title}</span>
<img src={article.urlToImage} alt=""/>
</div>
})
}
</div>
:
null
}
</div>

)
}

export default News;


4. 통신할 API와 관련된 코드 작성

4-1. axios 설치

1
npm install axios


4-2. api 코드 작성

1
2
3
4
5
6
7
// index.js in 'api' folder

import axios from 'axios';

export function getNews() {
return axios.get('https://newsapi.org/v1/articles?source=cnn&apiKey=APIKEY')
}

APIKEY는 News API에서 API KEY를 요청하여 받아야 한다.


5. action 및 action types 등록

5-1. action creator 생성

1
2
3
4
5
6
7
// action.js

import * as types from './actionType';

export const getNews = () => ({
type: types.GET_NEWS_REQUEST,
});


5-2. action type 생성

1
2
3
4
5
// actionType.js

export const GET_NEWS_REQUEST = "GET_NEWS_REQUEST";
export const GET_NEWS_SUCCESS = "GET_NEWS_SUCCESS";
export const GET_NEWS_FAILURE = "GET_NEWS_FAILURE";


6. Container 컴포넌트에서 액션을 dispatch(state 및 dispatch 코드 작성)

1
2
3
4
5
6
7
8
9
10
11
12
13
14
15
16
17
18
19
20
21
22
23
24
25
26
27
28
29
30
31
32
33
34
35
36
37
38
39
40
41
42
43
44
45
// ContainerRedux.js

import React, { Component } from 'react';
import { connect } from "react-redux";
import Button from './components/Button'
import Loading from './components/Loading'
import News from './components/News'
import { getNews } from './redux'

class ContainerRedux extends Component {
onClickGetNews = () => {
this.props.getNews();
}
render() {
const { loading, articles } = this.props;
return (
<div className="">
<Button
onClickGetNews={this.onClickGetNews}
/>
<Loading
loading={loading}
/>
<News
articles={articles}
/>
</div>
);
}
}

function mapStateToProps(state) {
return {
articles: state.getNews.articles,
loading: state.getNews.loading
};
}

function mapDispatchToProps(dispatch) {
return {
getNews: () => dispatch(getNews())
};
}

export default connect(mapStateToProps, mapDispatchToProps)(ContainerRedux);


7. 액션을 받아 비동기 통신 처리를 할 saga 작성

1
2
3
4
5
6
7
8
9
10
11
12
13
14
15
16
17
18
19
20
21
22
23
24
25
26
27
28
29
30
31
32
33
34
// index.js in 'sagas' folder

import * as API from '../api';
import * as types from '../redux/actionType';
import { call, put, fork, take, all } from 'redux-saga/effects';

function* fetchNews() {
while (true) {
yield take(types.GET_NEWS_REQUEST);
try {
const res = yield call(API.getNews);
console.log('res', res)
if (res.status === 200) {
yield put({
type: types.GET_NEWS_SUCCESS,
payload: res.data
})
} else {
throw new Error();
}
} catch (e) {
yield put({
type: types.GET_NEWS_FAILURE
})
}
}

}

export default function* rootSaga() {
yield all([
fork(fetchNews)
]);
}


effect란, 각각의 task를 기술하기 위한 명령어이다. 대표적인 effect는 다음과 같다.

  • take: Action을 기다린다.
  • put: Action을 Dispatch 한다.
  • call: Promise의 완료를 기다린다.(서버 API와의 통신할 때 주로 사용)
  • fork: 다른 task를 시작한다.
  • join: 다른 task의 종료를 기다린다.
  • select: state로부터 필요한 데이터를 꺼낸다.


8. saga 이후, state를 변경할 reducer 작성

1
2
3
4
5
6
7
8
9
10
11
12
13
14
15
16
17
18
19
20
21
22
23
24
25
26
27
28
29
30
31
32
33
34
35
36
// reducer.js

import { combineReducers } from "redux";
import * as types from "./actionType";

const initialGetNews = { payload: { articles: [] }, loading: false }

const getNews = (state = initialGetNews, action) => {
switch (action.type) {
case types.GET_NEWS_REQUEST:
return {
...state,
loading: true
};
case types.GET_NEWS_SUCCESS:
const { articles } = action.payload;
console.log('articles', articles)
return {
...state,
articles,
loading: false
};
case types.GET_NEWS_FAILURE:
return {
...state
}
default:
return state;
}
};

const rootReducer = combineReducers({
getNews
})

export default rootReducer;


화면 재로딩(refresh) 없이, post 요청한 데이터 같은 화면에 바로 가져오는 방법


만약, 화면에서 데이터를 서버에 보내고(post), 보낸 데이터와 관련된 데이터를 받아와야 하는 경우를 saga에서 처리할 수 있다.

예를 들어, ‘기부하기’ 버튼을 클릭해서, donation 액션을 dispatch 할때, payload로 기부자 이름과 메세지를 보낸다고 하자. 그리고, 아래 화면에는 기부자와 메세지를 보여준다고 해보자. 그럼 refresh 없이, ‘기부하기’ 버튼 클릭 후, 바로 화면에 데이터를 보여줄려면 어떻게 해야할까?

이것을 saga에서 처리하는 데,

  1. 데이터를 서버에 보낸다.(yield call(API, payload))
  2. 성공하면(res.status === 200), 서버에서 데이터를 받아오는 API를 get 요청하여 받아온다.(yield call(getAPI))
  3. 성공하면(res.status === 200), 액션을 dispatch 하여, reducer에서 새로 받아온 데이터로 값을 변경하여, 화면에 데이터를 뿌려주게 된다.
1
2
3
4
5
6
7
8
9
10
11
12
13
14
15
16
17
18
19
20
21
22
23
24
25
26
27
28
29
30
31
32
33
34
35
36
37
38
39
function* addDonation() {
while (true) {
const request = yield take(types.ADD_DONATION_REQUEST);

try {
const { payload } = request;

// 서버로 post 요청
const res = yield call(API.addDonation, payload);

if(res.status === 200 && res.data.success){
yield put({
type: types.ADD_DONATION_SUCCESS,
payload:res.data
});

// 화면에 뿌려줄 데이터 서버로부터 가져오기
const result = yield call(API.getHistoryList,{pageSize:10, pageNum:0})
if(result.status === 200){

// 서버로부터 가져온 데이터를 화면에 뿌려주기 위한 액션을 disaptch 하기
yield put({
type: types.GET_HISTORY_LIST_SUCCESS,
payload:result.data
});
}else{
console.log('throw res2')
throw new Error();
}
}else if(res.data.success === false){
}

} catch (e) {
yield put({
type: types.ADD_DONATION_FAILURE
});
}
}
}

Combo Box

UI: Combo Box(= Input + Dropdown)


요구 사항:

  • input 박스에서 입력은 못하고, 오른쪽 끝에 클릭하면 list를 보여줄 수 있는 아이콘 추가
  • 아이콘을 클릭하면, 선택할 수 있는 list 나열
  • list의 각 option을 클릭하면, 그 option은 input 박스에 bold 상태로 보임
  • 단, option 중 ‘직접 입력하기’를 클릭하면, input 박스에 focus가 되고, 값을 입력 가능


개발 접근법:

  • input 박스에 아이콘 추가(css)
  • list 중 선택한 option 값(e.target.innerText)를 input 박스의 value 값을 변경
  • ‘직접 입력하기’ option을 선택할 때는, input 박스에 focus를 적용(React의 ref 사용)


Code: React


Container.js


1
2
3
4
5
6
7
8
9
10
11
12
13
14
15
16
17
18
19
20
21
22
23
24
25
26
27
28
29
30
31
32
33
34
35
36
37
38
39
40
41
42
43
44
45
46
47
48
49
50
51
52
53
54
55
56
57
58
59
60
61
62
63
64
65
66
67
68
69
70
71
72
73
74
75
76
77
78
79
80
81
82
83
import React, { Component, Fragment } from 'react';
import Combobox from './components/Combobox'

class Container extends Component {
constructor(props) {
super(props);
this.childRef = React.createRef();
this.state = {
message: '',
placeholder: '',
showMessageList: false,
isDisabled: true,
options: []
}
}
componentDidMount () {
this.setState({
placeholder: '응원하세요.',
options: [
'직접 입력하기',
'여러분 힘내세요.',
'응원합니다.'
]
})
}
componentDidUpdate () {
if(this.state.placeholder === '직접 입력하기') {
this.childRef.current.focus();
}
}
onClick = () => {
this.setState({ showMessageList: true })
}
onClickMessage = (e) => {
const messageSelected = e.target.innerText;
if(messageSelected === '직접 입력하기') {
this.setState({
message: '',
placeholder: messageSelected,
isDisabled: false,
showMessageList: false
})
return;
}
this.setState({
message: e.target.innerText,
showMessageList: false,
placeholder: '응원 메세지 작성 혹은 선택해주세요.'
})
}
onChange = (e) => {
if(this.state.placeholder === '직접 입력하기') {
this.setState({
message: e.target.value,
showMessageList: false
})
}
}
onBlur = () => {
this.setState({ showMessageList: false })
}
render() {
const { message, placeholder, showMessageList, isDisabled, options } = this.state;
return (
<Fragment>
<Combobox
message={message}
placeholder={placeholder}
showMessageList={showMessageList}
isDisabled={isDisabled}
options={options}
ref={this.childRef}
onClick={this.onClick}
onClickMessage={this.onClickMessage}
onChange={this.onChange}
onBlur={this.onBlur}
/>
</Fragment>
);
}
}

export default Container;


Combobox.js


1
2
3
4
5
6
7
8
9
10
11
12
13
14
15
16
17
18
19
20
21
22
23
24
25
26
27
28
29
30
31
32
33
34
35
36
37
38
39
40
41
42
43
44
import React from 'react';

const Combobox = React.forwardRef((props, ref) => {
const inputStyle = props.message ? { 'fontWeight': 'bold' } : {}
return (
<div>
<h2>combo box...</h2>
<div className="dropdown">
<input
ref={ref}
style={inputStyle}
onChange={props.onChange}
onBlur={props.onBlur}
value={props.message}
placeholder={props.placeholder}
disabled={props.isDisabled}
type="text"
name="message"
title="message input"
/>
<span
className="arrow down"
style={{"cursor":"pointer"}}
onClick={props.onClick}
>
</span>
{
props.showMessageList ?
<ul className="showMessageList">
{
props.options.map((el, key) => {
return <li key={key}><span onMouseDown={props.onClickMessage} style={{"cursor":"pointer"}}>{el}</span></li>
})
}
</ul>
:
null
}
</div>
</div>
)
})

export default Combobox;


index.css


1
2
3
4
5
6
7
8
9
10
11
12
13
14
15
16
17
18
19
20
21
22
23
24
25
.dropdown {
position: relative;
}
.dropdown input {
position: relative;
width: 300px;
height: 30px;
}
.dropdown .down {
position: absolute;
top: 12px;
left: 290px;
border: solid black;
border-width: 0 3px 3px 0;
display: inline-block;
padding: 3px;
transform: rotate(45deg);
}
.dropdown ul {
list-style-type: none;
/* border-collapse: collapse; */
}
.dropdown li {
margin: 10px;
}

Promise

Promise란 무엇인가


Promise란 자바스크립트 비동기 처리에 사용되는 객체이다. 비동기 처리란, 특정 코드의 실행이 완료될 때까지 기다리지 않고, 다음 코드를 먼저 수행하는 자바스크립트의 특성을 말한다.


Promise를 사용하는 이유


자바스크립트는 비동기 처리를 위해 콜백 함수를 사용하였다. 그러나, 콜백 패턴은 처리 순서를 보장하기 위해 콜백 함수가 계속해서 중첩(nesting)되어 복잡도가 높아지는 콜백 헬이 발생하는 문제가 있다. 즉, 가독성이 좋지가 않게 된다. 이 문제를 해결하기 위해 ES6에서는 Promise를 사용한다.


Promise 사용 방법


Promise 생성

Promise는 Promise 생성자 함수를 이용해 인스턴스, 즉 Promise 객체를 반환한다. Promise 생성자 함수는 비동기 작업을 수행할 콜백 함수를 인자로 전달 받는다. 이 콜백 함수는 resolve 함수와 reject 함수이다.

1
2
3
4
5
6
7
8
9
10
const promise = new Promise((resolve, reject) => {
// 비동기 작업을 수행

if (/* 비동기 작업 수행 성공 */) {
resolve('result'); // resolve 함수 호출
}
else { /* 비동기 작업 수행 실패 */
reject('failure'); // reject 함수 호출
}
});


Promise 실행

1
2
3
promise
.then(result => console.log(result))
.catch(error -> console.log(error))


Promise 상태

  • pending: 비동기 처리가 아직 수행되지 않은 상태(resolve 또는 reject 함수가 아직 호출되지 않은 상태)
  • fulfilled: 비동기 처리가 성공적으로 수행된 상태(resolve 함수가 호출된 상태)
  • rejected: 비동기 처리가 실패된 상태(reject 함수가 호출된 상태)


Promise 기본 코드

1
2
3
4
5
6
7
8
9
10
11
12
13
const promise1 = function(param) {
return new Promise(function(resolve, reject) {
if(param) {
resolve("success") // "success"가 then 메소드의 result의 값으로 전달됨
} else {
reject("fail") // "fail"이 catch 메소드의 error의 값으로 전달됨
}
})
}

promise1(true)
.then(result => console.log(result))
.catch(error => console.log(error))

비동기 처리에 성공하면, resolve 함수가 호출되고, 이때 resolve 함수의 인자로 비동기 처리 결과를 전달한다. 이 처리 결과는 Promise 객체의 후속 처리 메소드로 전달된다.
비동기 처리에 실패하면, reject 함수가 호출되고, 이때 reject 함수의 인자로 에러 메시지를 전달한다. 이 에러 메시지는 Promise 객체의 후속 처리 메소드로 전달된다.


Promise 처리 흐름


How Promise Works

출처: Promise 처리 흐름


Promise 코드 예제


1
2
3
4
5
6
7
8
9
10
11
12
13
14
15
16
function getData() {
return new Promise(function (resolve, reject) {
api.get('https://naver.com/users/1', function (response) {
if (response) {
resolve(response);
}
reject(new Error("Request failure"));
});
});
}

getData().then(function (data) {
console.log(data); // response 값 출력(resolve 함수의 인자로 받아온 response가 data로 받아옴)
}).catch(function (err) {
console.error(err); // Error 출력
});


Promise 체이닝(Chainning)


Promise는 후속 처리 메소드를 체이닝(chainning)하여 여러 개의 프로미스를 연결하여 사용할 수 있기 때문에, 콜백 헬을 해결한다. Promise 객체를 반환한 비동기 함수는 프로미스 후속 처리 메소드인 then이나 catch 메소드를 사용할 수 있다. 따라서 then 메소드가 Promise 객체를 반환하도록 하면 여러 개의 프로미스를 연결하여 사용할 수 있다.

1
2
3
4
get(`${url}/1`)
.then(result1 => document.getElementById('app').innerHTML = result1)
.then(result2 => document.getElementById('result').innerHTML = result2)
.catch(error => console.log(error));


Promise.all


Promise는 주로 생성자 함수(new Promise)로 사용되지만, 메소드도 가지고 있다. 그 중, Promise.all 메소드는 여러개의 비동기 작업들이 존재하고, 이 비동기 작업들이 모두 완료되었을 때 작업을 진행하고 싶을 때 사용한다.

Promise.all 메소드는 프로미스가 담겨 있는 배열 등의 이터러블을 인자로 전달 받고, 이 모든 프로미스들은 병렬로 처리 되고, 그 처리 결과를 resolve하는 새로운 프로미스를 반환한다.

1
2
3
4
5
6
Promise.all([
new Promise(resolve => setTimeout(() => resolve(10), 3000)), // 10
new Promise(resolve => setTimeout(() => resolve(20), 2000)), // 20
new Promise(resolve => setTimeout(() => resolve(30), 1000)) // 30
]).then(console.log) // [ 10, 20, 30 ]
.catch(console.log);

Promise.all 메소드는 전달받은 모든 Promise를 병렬로 처리한다. 모든 Promise의 처리가 완료될 때까지 기다린 후에 모든 처리 결과를 resolve 또는 reject한다.

Promise.all 메소드는 처리 순서가 보장되기 때문에, 나중에 있는 Promise가 먼저 처리되더라도, 반환되는 Promise의 배열안에는 순서대로 반환된다.

1
2
3
4
5
6
Promise.all([
new Promise((resolve, reject) => setTimeout(() => reject(new Error('Error 1!')), 8000)),
new Promise((resolve, reject) => setTimeout(() => reject(new Error('Error 2!')), 1000)),
new Promise((resolve, reject) => setTimeout(() => reject(new Error('Error 3!')), 5000))
]).then(console.log)
.catch(console.log); // Error: Error 2!

Promise 처리가 하나라도 실패하면, 가장 먼저 실패한 Promise가 reject한 error를 reject하는 새로운 Promise를 반환한다.

Twitter 공유하기 버튼 만드는 방법

Twitter 공유하기 버튼 만들기


Twitter 공유하기 버튼은 Twitter에서 제공하는 버튼 이미지를 사용해도 되지만, 여기서는 다른 Twitter 이미지를 버튼(일반 이미지)으로 사용하는 방법으로 해보자.

React에서 코드를 작성하면 다음과 같다.

1
2
3
4
5
6
7
8
9
10
11
12
13
14
15
16
17
import React, { Component } from 'react';
import Twitter from '../../image/twitter.png';

class Twitter extends Component {
onClicTwitter = () => {
window.open('https://www.twitter.com/intent/tweet?&url=https://naver.com/')
}
render() {
return (
<div className="Twitter">
<button onClick={this.onClickTwitter}><img src={twitter} alt="twitter"></button>
</div>
);
}
}

export default Twitter;

위 코드 중, naver.com 대신 공유할 도메인 주소로 변경하면 된다.


*트위터 공유 관련 참고 사이트

Facebook 공유하기 버튼 만드는 방법

Facebook 공유하기 버튼 만들기


Facebook 공유하기 버튼은 Facebook에서 제공하는 버튼 이미지를 사용해도 되지만, 여기서는 다른 Facebook 이미지를 버튼(일반 이미지)으로 사용하는 방법으로 해보자.

React에서 코드를 작성하면 다음과 같다.

1
2
3
4
5
6
7
8
9
10
11
12
13
14
15
16
17
import React, { Component } from 'react';
import facebook from '../../image/facebook.png';

class Facebook extends Component {
onClicFacebook = () => {
window.open('https://www.facebook.com/sharer/sharer.php?u=https://naver.com/')
}
render() {
return (
<div className="Facebook">
<button onClick={this.onClickFacebook}><img src={facebook} alt="facebook"></button>
</div>
);
}
}

export default Facebook;

위 코드 중, naver.com 대신 공유할 도메인 주소로 변경하면 된다.


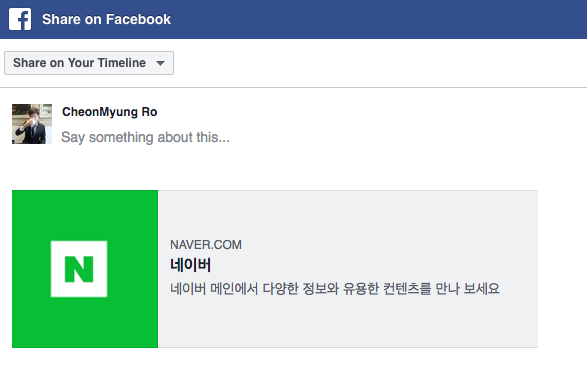
공유하기 버튼을 클릭하면, 다음과 같이 나온다.

페이스북 공유 페이지

위 그림에서 공유할 페이지의 이미지, title, description 등은 원하는 대로 변경할 수 있다.

React 폴더 중, index.html에 meta 태그로 추가하면, 공유할 썸네일을 원하는대로 커스텀 할 수 있다.

1
2
3
4
5
<meta property="og:url" content="https://www.your-domain.com/your-page.html" />
<meta property="og:type" content="website" />
<meta property="og:title" content="Your Website Title" />
<meta property="og:description" content="Your description" />
<meta property="og:image" content="https://www.your-domain.com/path/image.jpg" />


*페이스북 공유 관련 참고 사이트

Kakao 공유하기 버튼 만드는 방법

Kakao 공유하기 버튼 만들기


카카오(KakaoDevelopers)에서 제공하는 kakao API를 이용해 카카오톡 공유하기 버튼을 만들 수 있다.

카카오 API를 사용하기 위한 기본 세팅 순서는 다음과 같다.

  1. KakaoDevelopers에 들어가, 본인의 카카오 계정으로 로그인한다.
  2. 내 애플리케이션 - 앱 만들기에서 앱의 이름, 회사 이름 및 로고를 추가한다.
  3. 각 API에 맞는 키를 받게된다.
  4. 설정 - 일반의 플랫폼에서 나의 웹사이트 주소를 추가한다.
  5. KakaoDevelopers 사이트의 상단 탭 중 개발가이드를 클릭하면, 다양한 API를 활용하는 가이드가 나온다.
  6. 웹 개발을 한다면, JavaScript 개발가이드에서 카카오링크를 클릭한다.
  7. 카카오링크에서 제공하는 방식에 따라 자유롭게 카카오 sdk를 활용하면 된다.


React에서 개발 순서는 다음과 같다.

  1. ìndex.html에 카카오 sdk를 등록한다.
  2. 사용할 앱의 JavaScript 키를 설정한다.
  3. 카카오링크 버튼을 생성한다.
  4. 화면에 보여주기 위해 HTML에 카카오링크 버튼을 추가한다.


  1. React 폴더의 index.html에서 태그 제일 아래에 sdk 코드 태그를 등록한다.
1
2
3
4
5
6
7
8
9
10
11
12
13
14
15
16
<!DOCTYPE html>
<html lang="en">
<head>

...

<title>React App</title>
</head>
<body>
<noscript>You need to enable JavaScript to run this app.</noscript>
<div id="root"></div>

// 카카오 sdk 등록
<script src="//developers.kakao.com/sdk/js/kakao.min.js"></script>
</body>
</html>


  1. 사용할 앱의 JavaScript 키를 설정한다.

카카오톡 API를 사용하기 위해서는 기본적으로 카카오로부터 받은 키를 사용해야 한다. 여기서는 JavaScript 키를 사용한다.

React에서 사용할 때는, componentDidMount에서 사용할 앱의 JavaScript 키를 설정한다.

1
2
3
componentDidMount() {
window.Kakao.init('YOUR APP KEY');
}

KakaoDevelopers 개발가이드에서는 Kakao.init이라고 나와있지만, React에서 사용할 때는 앞에 window를 사용해야 한다. 왜냐하면, 카카오 sdk를 index.html에 등록했기 때문에, JavaScript 키를 설정하는 컴포넌트에서는 전역 객체로 접근해야 하기 때문에, window.Kakao.init() 이렇게 사용한다.


  1. 카카오링크 버튼을 생성한다.
1
2
3
4
5
6
7
8
9
10
11
12
13
14
15
16
17
18
19
20
21
22
23
24
25
26
27
28
29
30
31
32
33
34
35
36
37
38
39
40
41
42
43
44
45
46
componentDidMount() {
window.Kakao.Link.createDefaultButton({
container: '#kakao-link-btn',
objectType: 'feed',
content: {
title: '딸기 치즈 케익',
description: '#케익 #딸기 #삼평동 #카페 #분위기 #소개팅',
imageUrl: 'http://mud-kage.kakao.co.kr/dn/Q2iNx/btqgeRgV54P/VLdBs9cvyn8BJXB3o7N8UK/kakaolink40_original.png',
link: {
mobileWebUrl: 'https://cheonmro.github.io/',
webUrl: 'https://cheonmro.github.io/'
}
},
social: {
likeCount: 286,
commentCount: 45,
sharedCount: 845
},
buttons: [
{
title: '웹으로 보기',
link: {
mobileWebUrl: 'https://cheonmro.github.io/',
webUrl: 'https://cheonmro.github.io/'
}
},
{
title: '앱으로 보기',
link: {
mobileWebUrl: 'https://cheonmro.github.io/',
webUrl: 'https://cheonmro.github.io/'
}
}
]
});
}
render() {
return (
<div className="Kakao">
<h2>kakao page</h2>
<a id="kakao-link-btn" href="javascript:;">
<img src="//developers.kakao.com/assets/img/about/logos/kakaolink/kakaolink_btn_medium.png"/>
</a>
</div>
);
}

container#kakao-link-btn은 html의 버튼으로 사용할 id의 이름과 동일해야 한다.
imageUrl의 위 주소는 카카오에서 기본적으로 제공하는 이미지이다. 만약, 내가 원하는 이미지를 사용하고 싶다면, 다른 이미지 주소로 바꿔주면 된다.


*custom 이미지 적용하는 방법

  • 카카오톡 공유하기 템플릿 중, feed 타입에서 권장하는 사이즈는 800px*800px 이다.
  • 먼저 이미지를 이 사이즈로 만든다. 이미지의 사이즈를 원하는 대로 바꾸고 싶다면, png 크기 조절 사이트에서 사이즈를 변경하면 된다. 이때, 가로/세로 비율 유지를 클릭하지 말고, 800px*800px으로 변경한다.
  • 변경한 이미지를 url 주소로 변경하고 싶다면, 이미지 호스팅 사이트에서 url 주소를 생성하면 된다. 여기서 생성한 Image URL을 위 코드의 imageUrl에 작성하면 된다.

위에 작성한 모든 url들은 KakaoDevelopers에서 플랫폼에 등록한 도메인이어야 한다.


*카카오톡 공유 버튼을 클릭시에 다음과 같은 에러가 나는 경우

1
2
요청 실패
잘못된 요청입니다.

해결책: 설정 - 일반의 플랫폼에 공유할 도메인 뿐만 아니라, http://localhost:3000 또한 등록한다.

위 코드를 기본으로 조금 응용해서, 내가 원하는 버튼 이미지로 카카오톡 공유하기를 사용할 수 있다.

1
2
3
4
5
6
7
8
9
10
11
12
13
14
15
16
17
18
19
20
21
22
23
24
25
26
27
28
29
30
31
32
33
34
35
36
37
38
39
40
41
42
43
44
45
46
47
48
49
50
51
52
53
54
55
import React, { Component } from 'react';
import kakao from '../../image/kakao.png';

class Kakao extends Component {
componentDidMount() {
window.Kakao.init('YOUR APP KEY');

window.Kakao.Link.createDefaultButton({
container: '#kakao-link-btn',
objectType: 'feed',
content: {
title: '딸기 치즈 케익',
description: '#케익 #딸기 #삼평동 #카페 #분위기 #소개팅',
imageUrl: 'http://mud-kage.kakao.co.kr/dn/Q2iNx/btqgeRgV54P/VLdBs9cvyn8BJXB3o7N8UK/kakaolink40_original.png',
link: {
mobileWebUrl: 'https://cheonmro.github.io/',
webUrl: 'https://cheonmro.github.io/'
}
},
social: {
likeCount: 286,
commentCount: 45,
sharedCount: 845
},
buttons: [
{
title: '웹으로 보기',
link: {
mobileWebUrl: 'https://cheonmro.github.io/',
webUrl: 'https://cheonmro.github.io/'
}
},
{
title: '앱으로 보기',
link: {
mobileWebUrl: 'https://cheonmro.github.io/',
webUrl: 'https://cheonmro.github.io/'
}
}
]
});
}
onClickKakao = () => {
window.open('https://sharer.kakao.com/talk/friends/picker/link')
}
render() {
return (
<div className="Kakao">
<button id="kakao-link-btn" onClick={this.onClickKakao}><img src={kakao} alt="kakao" /></button>
</div>
);
}
}

export default Kakao;

여러 사람이 작업한 branch를 merge하는 방법

원격저장소에 push 되어있는 branch들을 dev 브랜치로 merge 하는 방법


예시: 두 사람이(A와 B) login 브랜치와 text 브랜치를 따로 따서, 각각 원격에 push하고, 이 브랜치들을 dev 브랜치에 merge하는 과정을 순서대로 나열하면 다음과 같다.


1. A라는 사람이 자신의 로컬에 있는 login 브랜치를 원격 저장소에 있는 login 브랜치에 push 한다.


git add .

git commit -m "add login functions

git push origin login


2. B라는 사람이 자신의 로컬에 있는 text 브랜치를 원격 저장소에 있는 text 브랜치에 push 한다.


git add .

git commit -m "add text functions

git push origin text


3. merge를 담당하는 사람이 자신의 로컬에 있는 dev 브랜치에 원격에 있는 두 브랜치를 모두 merge 한다.


로컬에서 원격 브랜치에 접근하기 위해서는 다음의 명령어를 실행해야 한다.

git remote update

이는, 현재 원격에 있는 브랜치들을 갱신하여, 원격 브랜치들을 tracking 할 수 있게 한다.(remote-tracking branches set up locally)

fetch와 동일하다.

참고: git remote branch 가져오기


4. 로컬의 dev 브랜치로 이동한다.


git checkout dev

로컬의 dev 브랜치로 이동하여, 원격에 push 되어있는 새로운 브랜치(login/text)를 merge를 해야한다.


5. 원격에 push 되어있는 새로운 브랜치(login/text)를 merge 한다.


login 브랜치 merge

git merge origin/login

text 브랜치 merge

git merge origin/text

이때 겹치는 코드가 있다면 충돌(conflict)이 일어날 수 있다. 충돌이 난다면, 코드를 보면서 적절하게 고치면 된다.


6. 모든 브랜치들을 로컬의 dev 브랜치로 merge 했다면, 이 dev 브랜치를 원격으로 push 한다.


git push origin dev


참고: remote-tracking branches set up locally


7. merge된 원격 dev 브랜치를 다른 팀원이 로컬로 받아와, 코드를 동일하게 해야 한다.


자신의 로컬의 dev 브랜치에서, 원격에 있는 dev 브랜치의 코드와 동일하게 하기 위해서는, 다음의 명령어를 사용해야 한다.

git pull origin dev

이렇게 하면, 모든 새로운 기능들이 추가된 코드를 모든 팀원이 공유하게 되고, 다시 새로운 브랜치를 따서 새로운 기능을 개발하면 된다.